Forking the repo
Begin forking
Click Fork on the top right of the repo screen.

Select group
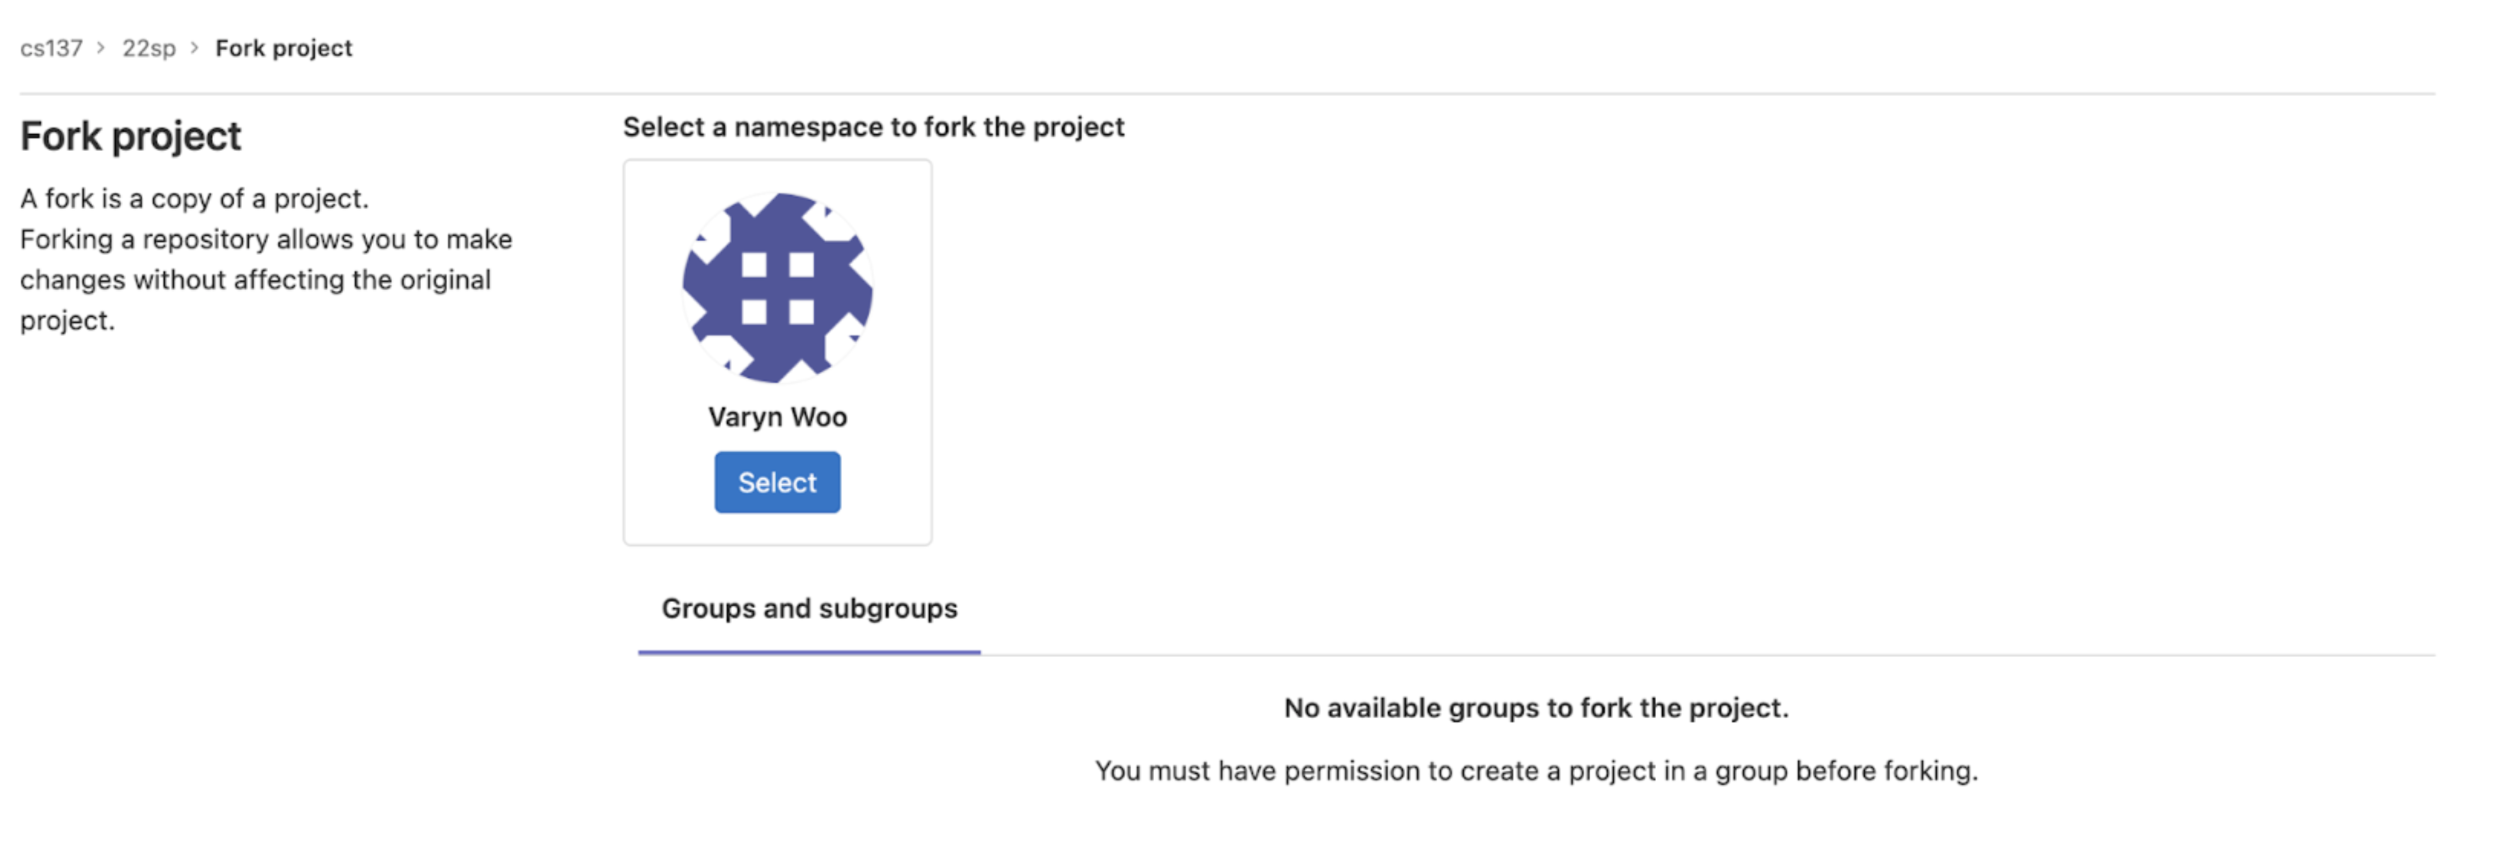
After clicking the Fork button, you should encounter this screen:

From the namespace selection screen, select your name (if you are working individually) or your group (if you are working in a group). Your group should show up in the Groups and subgroups section if registered properly. This should take you to a loading screen:

The forking process should take about a minute. Once you are done forking, you should arrive at this success screen with an exact replica of the repo you just forked, but under your account. This is what you want.

Set privacy
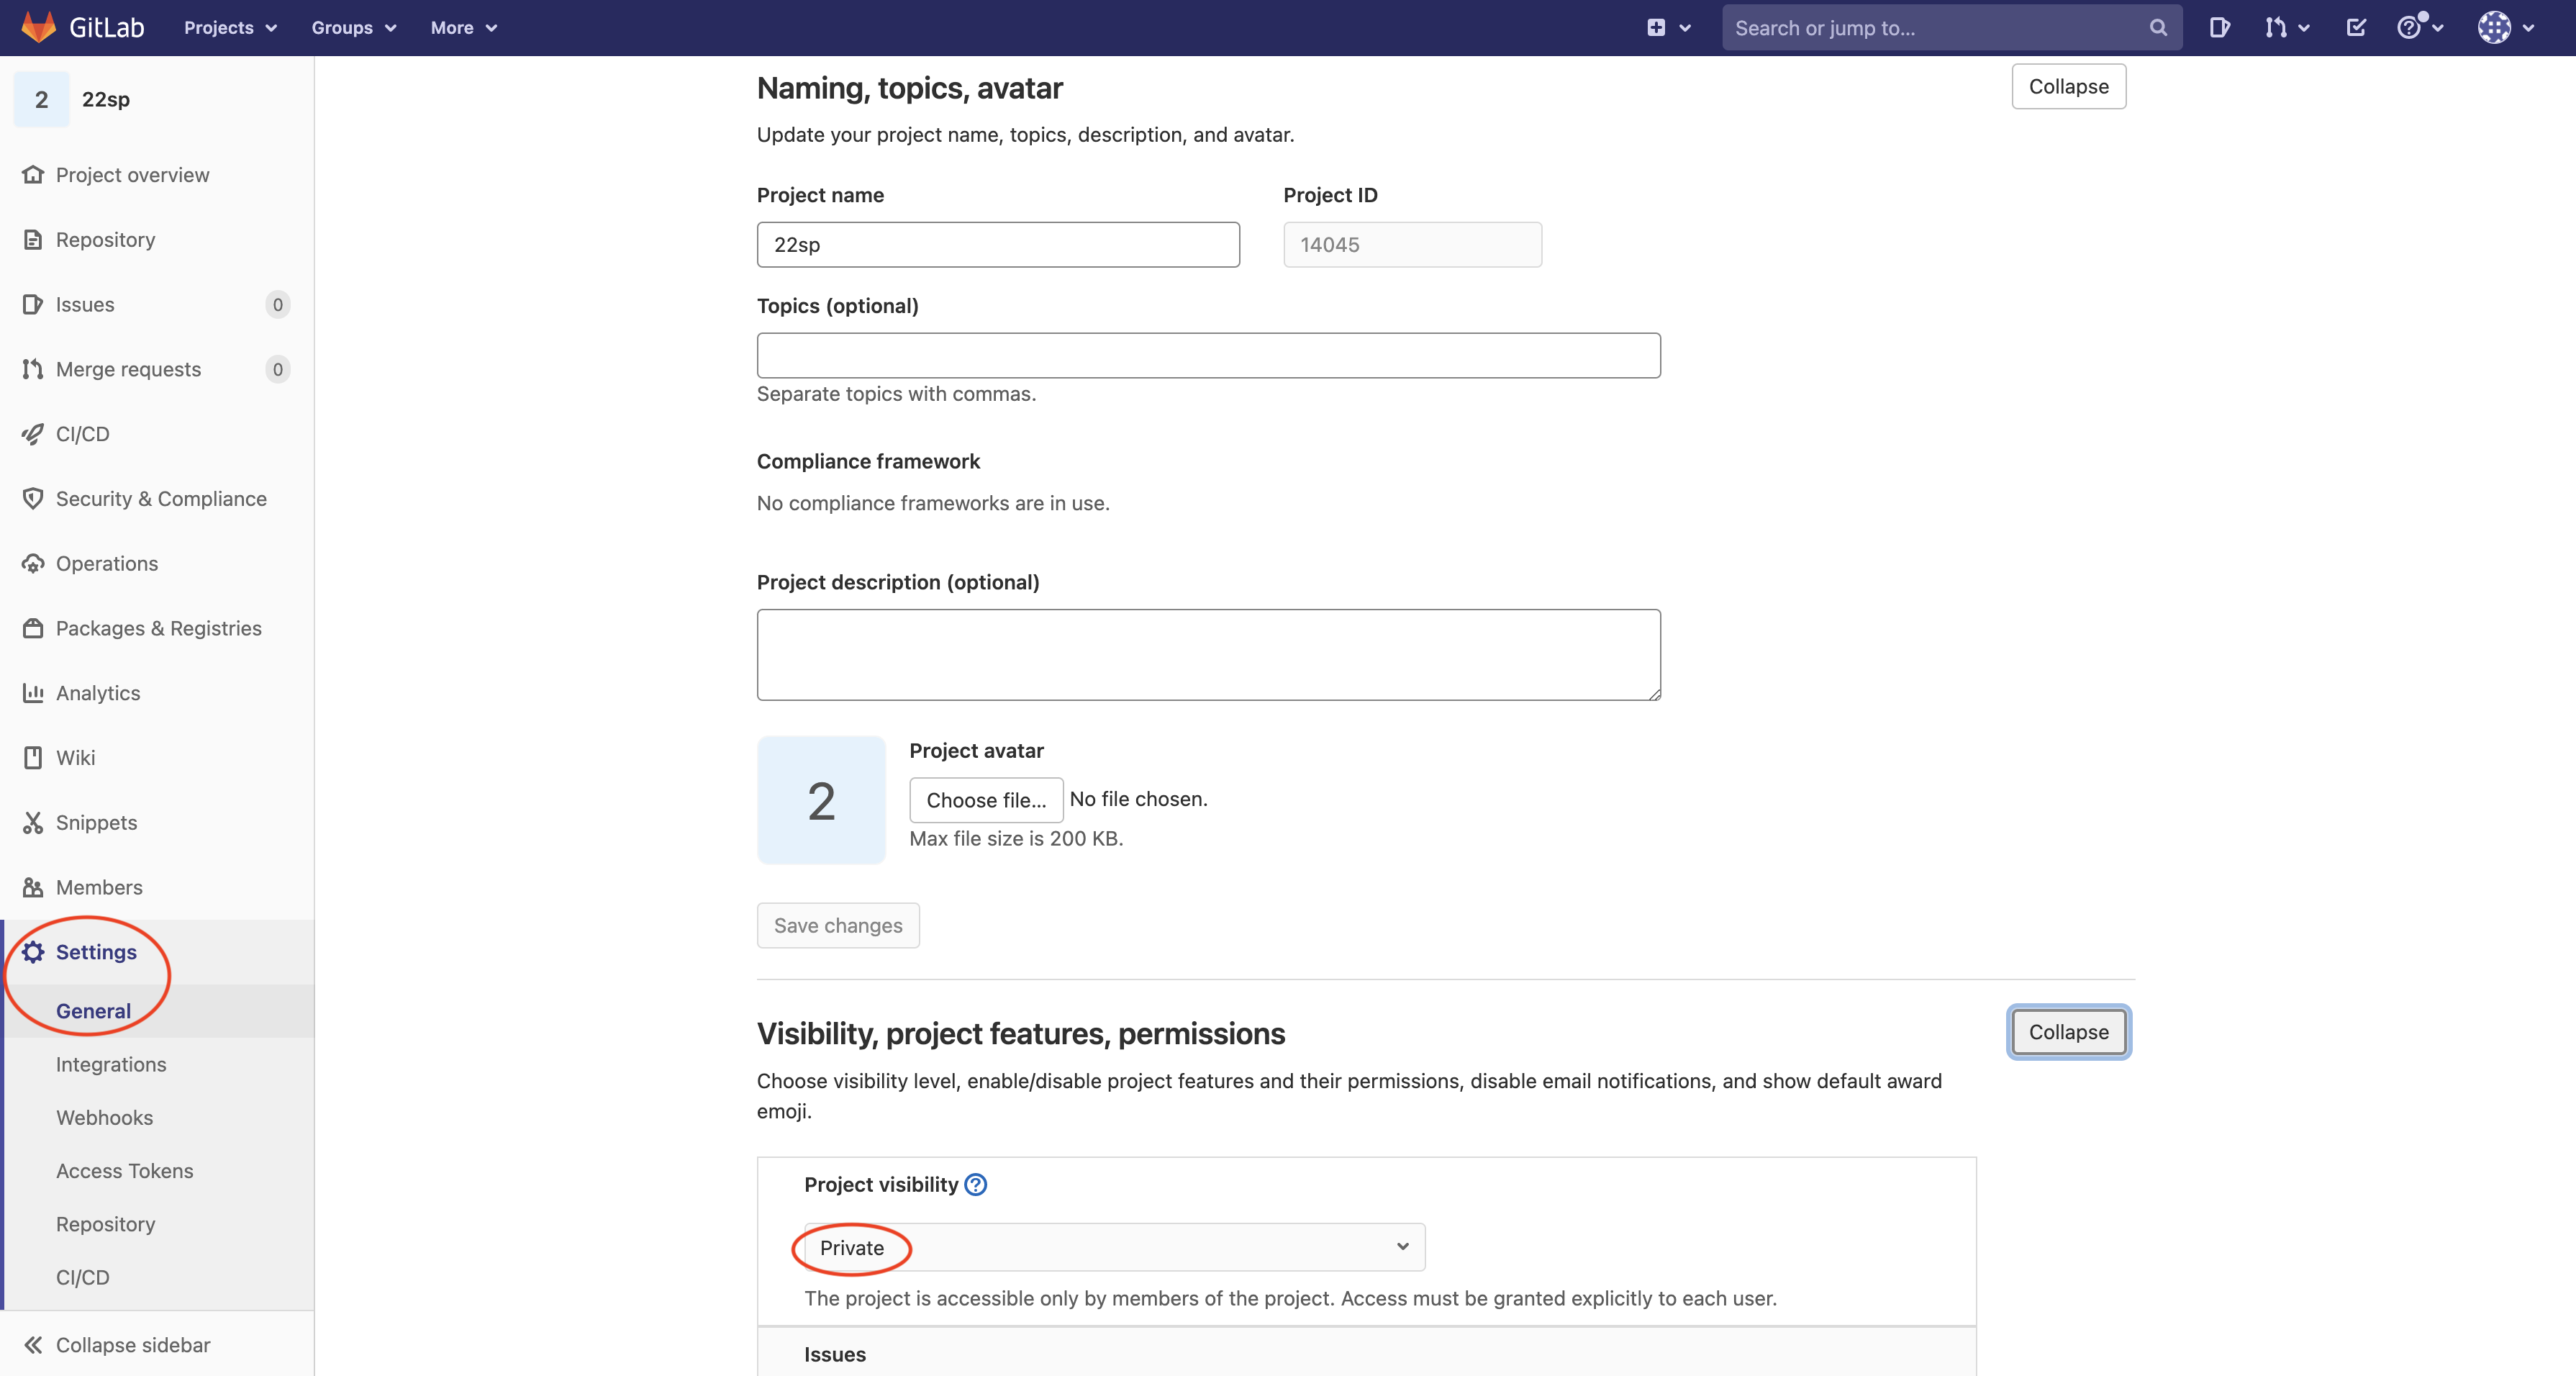
Once you have successfully forked the repo, go to Settings -> Visibility, Project Features, Permissions and ensure that the project visibility is private:

Adding instructors
Next, go to the Members section of your newly forked repo.

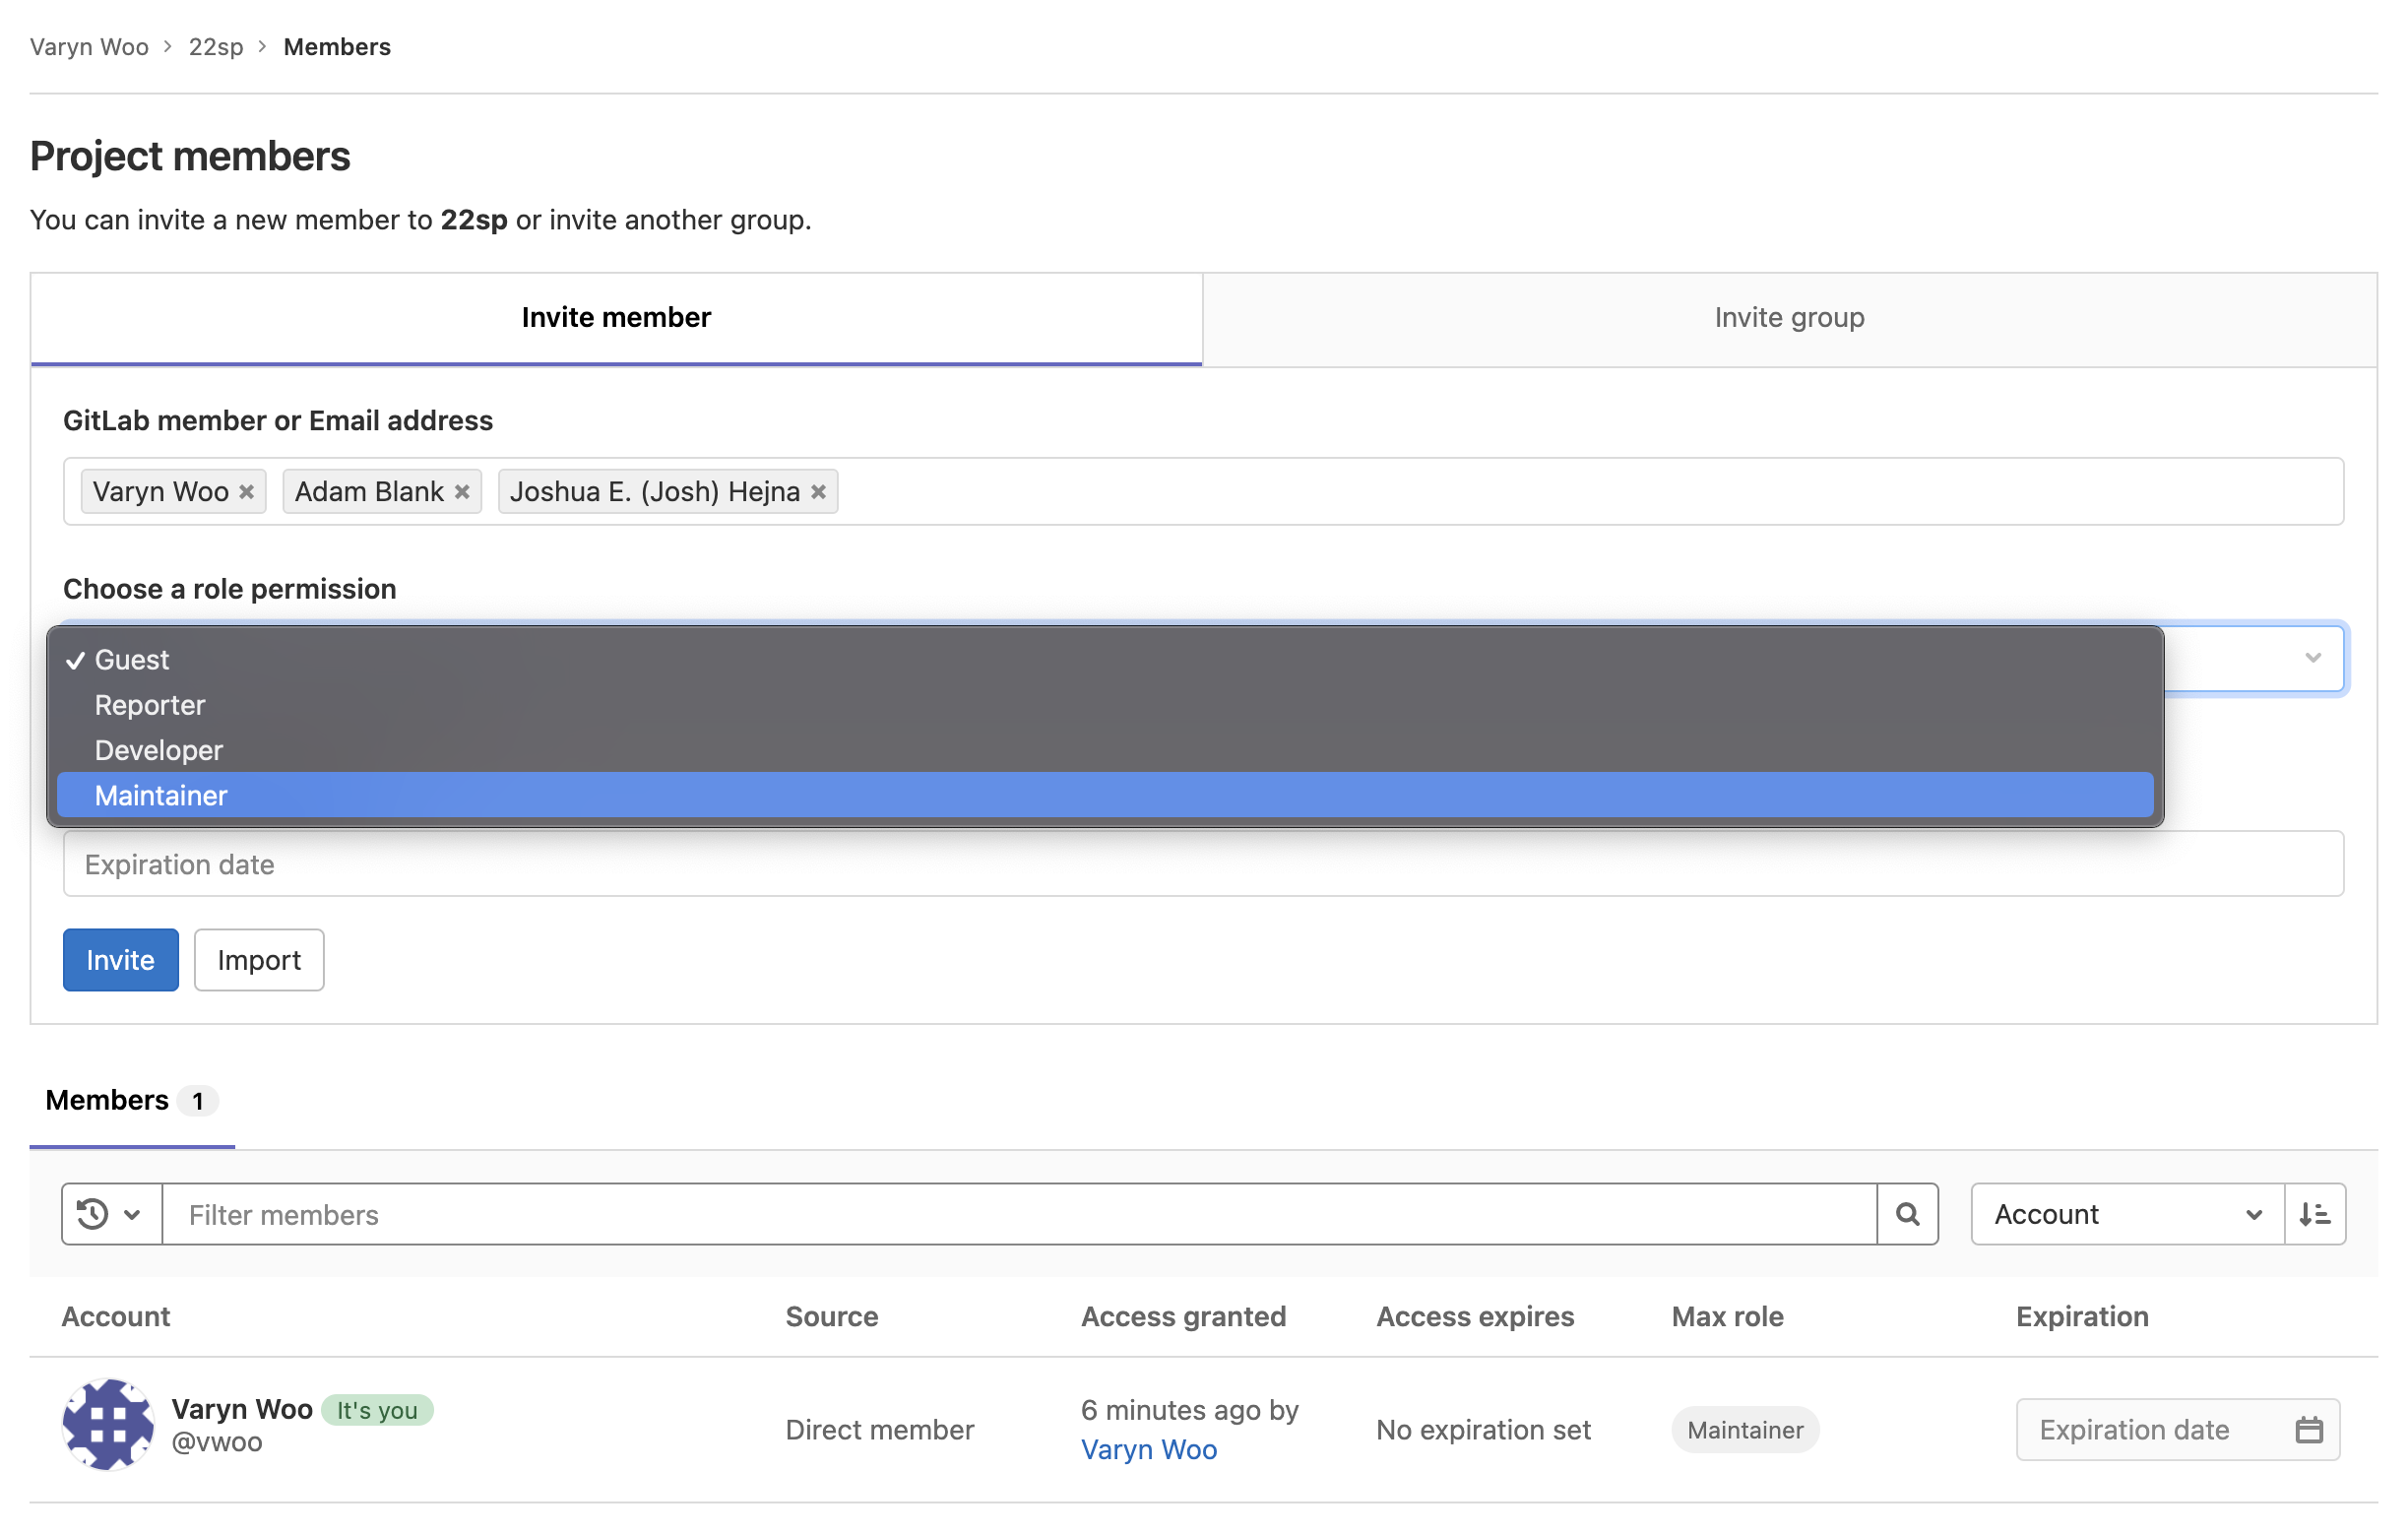
Next, add Adam, Varyn, and Ilana to your repo by typing in their names under the Gitlab member or Email address field. Then, set the role permission to Maintainer. Make sure to give us the correct permissions so that we can have full access to your code!

When you’ve added us and selected the Maintainer permission, click Invite.
Under the Members tab, you should see all 3 of our names appearing like Adam’s and Ilana’s do in the screenshot (I am using my account for the screenshot, so my entry in the members table looks a bit different than it will on yours):

Now, you should be ready to code! We will be able to see all of the changes you push to the forked repo, but your changes will not affect the original repo for the class. If you run into any technical difficulties, feel free to ask a TA for help!